
0%

A polished lash lift begins with more than a steady hand. The right Lash Lifting Tools help professional artists place lashes neatly, work with control, and keep each step consistent. A well-fitting silicone shield, for example, can support clean alignment, while a fine applicator helps separate lashes that want to cross or cling together. Small details matter.

This guide explores ten tools used in professional lash services, from shields and lifting rods to lash combs, microbrushes, and mixing accessories. It considers how each item feels in use, what it can help with, and where its limits show. A tool that suits one artist’s routine may feel awkward in another’s hands. Client lash length, direction, and sensitivity also affect selection, so no single kit fits every appointment.

Clean, well-maintained tools and careful attention to product instructions support a more dependable service. That part is easy to overlook. The list is intended as a practical starting point, not a promise that any tool will create a perfect result. Even experienced artists may need to adjust their setup—or reconsider a favorite item—when the lashes in front of them call for a different approach.
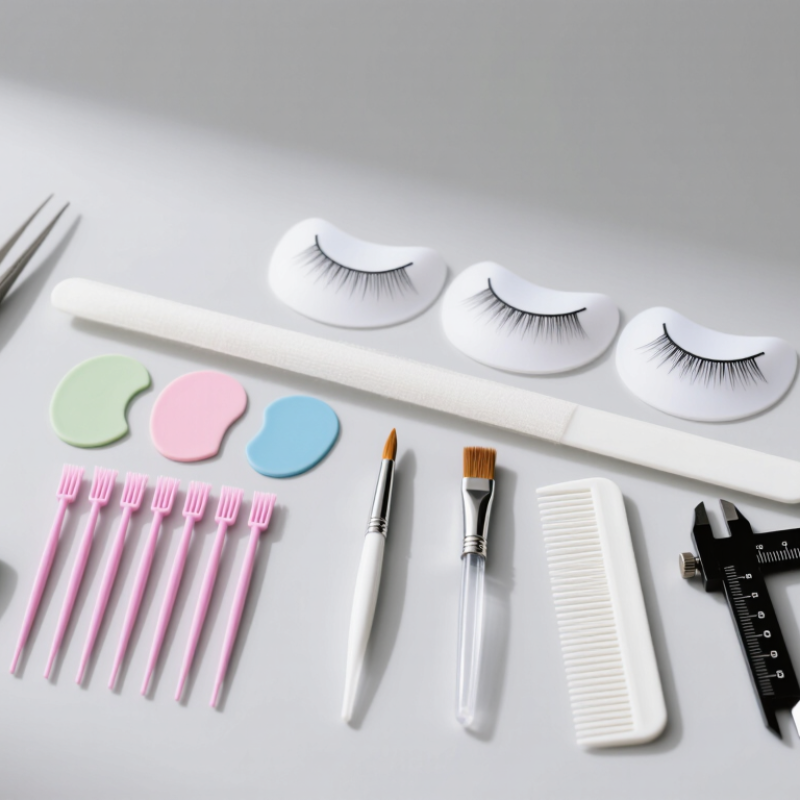
Top 10 Lash Lifting Tools for Professional Lash Artists

Understanding Lash Lifting Tools and Their Functions

Top 10 Lash Lifting Tools for Professional Lash Artists
Understanding Lash Lifting Tools and Their Functions

Lash lifting depends on several small tools working together. Silicone shields or rods shape the lashes against the eyelid, while their size influences the finished curl. A well-fitting shield should sit comfortably and suit the client’s natural lash length. Bigger is not always better. If lashes barely reach the shield, the result may look subtle.

Fine applicators help place lashes evenly on the shield, and isolation tweezers separate crossed strands. A clean lash comb can reveal gaps before lifting products are applied. Microbrushes are useful for precise product placement and cleanup around the lash line. Keep them single-use, and avoid loading them with excess product. A timer supports consistent processing, but it cannot replace checking the product instructions or assessing the lashes.

Preparation tools matter, too. Gentle cleansing removes makeup and oil that may interfere with placement. Good lighting helps artists spot stray lashes and uneven sections. Small details count. Tool choice still requires judgment: shields vary, eyelids differ, and natural lashes are not perfectly uniform. It can be tempting to blame the tools when a result looks uneven, but technique and fit deserve a closer review. A tidy workstation helps, though it does not guarantee a great lift.

Main Categories of Tools Used in Professional Lash Lifting

Professional lash lifting uses several tool categories, each serving a distinct stage. Silicone shields or rods shape the curl. Their size should suit lash length and the desired lift, not just eye shape. A shield that is too small may create a sharp bend; one that is too large may leave short lashes barely lifted. Lash combs and fine isolation tweezers help separate crossed hairs. A flat applicator or positioning tool then lays each lash evenly along the shield. Tiny gaps matter. Excessive tension can distort the result, so check alignment from more than one angle.

Application tools include disposable microbrushes for placing small amounts of lifting products, while lint-free pads help keep the work area tidy. A timer supports consistent processing, but it cannot replace checking the product directions and the lashes’ condition. Keep tools clean, and use single-use items only once. A small mirror can reveal uneven placement near the inner and outer corners. That detail is easy to miss. In practice, tool choice is not always obvious; the most comfortable shield may not create the intended shape. Pause and reassess rather than forcing the fit.

Top 10 Lash Lifting Tools for Professional Lash Artists

Main Categories of Tools Used in Professional Lash Lifting

This chart groups a practical 10-item lash-lifting checklist by workflow stage. Preparation includes a lash cleanser and under-eye pads; shield placement includes silicone shields, lash adhesive or balm, and an applicator; processing includes lifting and setting lotions; finishing includes microbrushes, a lash comb, and nourishing serum. Counts represent the tools listed in each category, not survey results or measures of effectiveness.

How to Select Tools for Different Lash Types and Treatments

A lash artist should choose tools around natural lash length, direction, and treatment goals. Short lashes often need a compact shield that places the lift close to the root without pinching the lid. Longer lashes may sit more comfortably on a larger shield or rod, reducing an overly curled result. Check the curve against the client’s eye before applying product. Small details matter. A fine-tooth comb helps separate crossed lashes, while a slim applicator gives more control near the inner corner.

Different treatments call for different levels of precision. For a soft, natural lift, flexible silicone shields and a precise placement tool can help keep lashes evenly aligned. A stronger curl may require a different shield shape, but avoid choosing by size alone; lash density and growth direction matter too. Use lint-free applicators for measured product placement, and keep a timer visible so processing follows the product’s directions. Cleanser, under-eye pads, and gentle tape also support tidy work and client comfort. Keep tools sanitized between clients and inspect silicone surfaces for wear. I still find shield selection less predictable on very straight lashes, so a careful fit check is worth the extra minute.

Top 10 Lash Lifting Tools for Professional Lash Artists — How to Select Tools for Different Lash Types and Treatments
Tool Main Use Best Suited Lash Type Treatment Fit Selection Tip
1. Silicone lift shields Position lashes on the eyelid and set the lift shape. Short or straight lashes that need a more noticeable lift; size should also suit the client’s eyelid and desired result. Standard lash lift and lift-and-tint services. Choose a shield that sits flush against the eyelid. Smaller shields generally create a tighter-looking lift; larger shields create a softer, more gradual curve.
2. Silicone lift rods Provide a rounded surface for shaping lashes. Medium-to-long lashes or clients seeking a softer, rounded curl. Traditional rod-based lifting treatments. Check the rod’s curve and diameter against lash length and the intended result. A rod that is too small may create an overly tight curl.
3. Lash-lifting comb or Y-comb Separate and align lashes along a shield or rod. Dense, crossed, or unevenly spaced lashes that need careful alignment. Most shield- and rod-based lift services. Use the comb gently from the base toward the tips, keeping lashes separated and avoiding overlap or crossed tips.
4. Fine-tip lash applicator Place and reposition individual lashes with controlled movements. Short, fine, or stubborn lashes that are difficult to arrange with a wider tool. Detailed lash placement during a lift or lift-and-tint service. Choose a smooth, rounded tip without burrs or sharp edges, and make sure it is suitable for the salon’s cleaning protocol.
5. Isolation tweezers Separate individual lashes and help manage lashes near the inner and outer corners. Dense lash lines, lashes that cross, and precise corner work. Preparation and placement for most lash-lifting treatments. Select a comfortable tweezer with aligned tips and a grip that allows steady control without excessive pressure.
6. Disposable microbrushes Apply small, controlled amounts of cleanser or treatment product where directed. All lash types; especially useful for targeted work and small areas. Pre-treatment cleansing and product application when permitted by the product instructions. Use a fresh applicator when required by hygiene practice, and do not return a used applicator to a product container.
7. Lint-free applicators Remove residue or apply products without leaving loose fibers on the lashes. All lash types, including fine lashes that can catch fibers. Preparation, cleanup, and tinting steps when compatible with the product directions. Choose lint-free materials and use separate applicators for different products or treatment stages.
8. Under-eye pads Cover and protect the lower lashes and delicate under-eye area during treatment. All lash types; useful when lower lashes are prominent or need to be kept away from the upper lash line. Lift-and-tint services and other treatments involving the upper lash line. Fit the pad comfortably below the waterline and check that it does not touch or irritate the eye.
9. Cosmetic tape Secure under-eye pads or gently reposition skin where appropriate. Clients whose lower lashes need additional isolation or whose eyelid position makes access difficult. Preparation and lash isolation for a lift or tint. Use skin-appropriate tape, apply with minimal tension, and remove gently. Avoid placing tape on the eye surface or pulling delicate skin.
10. Treatment timer Track each processing stage accurately. All lash types; timing should be determined by the treatment system and individual lash condition. Every chemical lash-lifting service, including lift-and-tint treatments. Follow the product manufacturer’s timing and professional training. Do not extend processing time to compensate for a poor lash placement or shield fit.

Professional note: Use products and tools according to their instructions and applicable hygiene standards. Clean and disinfect reusable tools as directed; discard single-use items after use. Always assess lash condition and client suitability before treatment.

Top 10 Essential Lash Lifting Tools for Professional Artists

A professional lash lift begins with tools that support control, comfort, and clean application. Keep several sizes of silicone shields available; one size rarely suits every eye shape or lash length. A flat applicator helps place lashes evenly, while fine-point isolation tweezers separate crossed hairs. A lash comb keeps the alignment visible. Small details matter.

Microbrushes and lint-free applicators allow precise product placement without bulky fibers. Soft under-eye pads protect the lower lash area, and a timer helps track each processing stage according to product directions. Add a handheld mirror for checking symmetry and a clean, disinfectable tray for organizing reusable tools. Single-use items should be discarded after each client. Reusable tools need appropriate cleaning between appointments. No shortcuts here.

Tool choice is only part of the work. Ask about sensitivities and explain the process before beginning; pause if the client feels discomfort. Shield selection is easy to rush, even for experienced artists, so reassess the fit before securing lashes. A slightly imperfect setup can pull hairs out of alignment. Take a moment to check. Regularly inspect tools for residue, damage, or worn edges, and replace anything that no longer works smoothly.

Safe Use, Cleaning, and Storage of Lash Lifting Tools

Clean tools before they touch a client. The CDC’s Guideline for Disinfection and Sterilization in Healthcare Facilities explains that soil can interfere with disinfection, so visible residue must be removed first. For lash artists, that means checking tweezer tips, hinges, and the undersides of silicone shields under bright light. Wash reusable tools with detergent and water, rinse thoroughly, then apply a compatible disinfectant for its full label contact time. Do not shorten the wait because the surface looks dry. Small details matter.

Hand hygiene belongs between every client and after handling used tools. The World Health Organization’s Guidelines on Hand Hygiene in Health Care specify 40–60 seconds for handwashing with soap and water. Keep clean tools away from used ones, and store them in a closed, dry container. Never return a damp tool to a drawer; trapped moisture can undermine a clean setup. Disposable or porous items should not be reused.

Inspect tools before each service. Discard pieces with cracks, rough edges, or damaged coatings, since these can trap residue or irritate delicate eyelid skin. Follow each tool’s care instructions, and never assume that one disinfectant suits every material. A missed hinge is easy to overlook, even in a careful routine. I would rather pause and re-clean than rush; consistency is harder on busy days.

FAQS

How should I choose a shield for short lashes?

Choose a compact shield that lifts close to the roots without pinching the eyelid. Check the curve against the client’s eye before applying product. Fit matters.

What works better for long lashes?

A larger shield or rod may help prevent an overly tight curl. Check lash length, density, and growth direction rather than choosing by size alone.

Which tools help keep lashes evenly aligned?

A fine-tooth comb can separate crossed lashes. A slim applicator offers more control near the inner corner. Small tools help.

How can I place products neatly?

Use lint-free applicators for measured placement. Keep a timer visible, and follow the product’s directions. Don’t guess the timing.

What should I clean before a service?

Remove visible residue from tweezer tips, hinges, and silicone shields. Wash reusable tools with detergent and water, rinse well, then use a compatible disinfectant for its full label contact time.

How should clean tools be stored?

Keep clean tools separate from used ones in a closed, dry container. Let tools dry before storage. Damp tools belong nowhere in a drawer.

How often should I clean my hands?

Clean your hands between clients and after handling used tools. Handwashing with soap and water should take 40–60 seconds. Easy to rush.

When should a tool be replaced?

Inspect tools before each service. Discard pieces with cracks, rough edges, or damaged coatings. I still second-guess shield fit on very straight lashes, so I allow an extra minute to check.

Conclusion

This guide explains how Lash Lifting Tools support each stage of a professional lash lift, from isolating natural lashes to shaping and setting them with precision. It introduces the main categories of tools, including lifting rods or shields, applicators, isolation tools, and brushes, and describes how each contributes to an efficient, consistent treatment. Because natural lashes vary in length, direction, and texture, the guide also covers how to choose suitable tools for different lash types and desired results.

The overview highlights ten essential tools professional artists may need, with attention to practical features such as control, comfort, and ease of use. It also emphasizes safe handling, thorough cleaning, and proper storage to help keep tools hygienic and in good condition. Together, these points offer a clear foundation for selecting and caring for a reliable lash-lifting toolkit.

Willowayne

Willowayne

Willowayne is a professional marketing specialist with a strong understanding of the company’s products and the needs of the customers who use them. Combining product knowledge with clear, practical communication, Willowayne helps readers understand key features, compare suitable options, and make......